I introduce solving equations by building off of the visual presentation used to introduce equations. The two photos below show an example of handouts I use. Below these two photos I offer an explanation of how I use these handouts.


First I develop an understanding of a balanced equation vis-a-vis an unbalance equation using the seesaw representation.
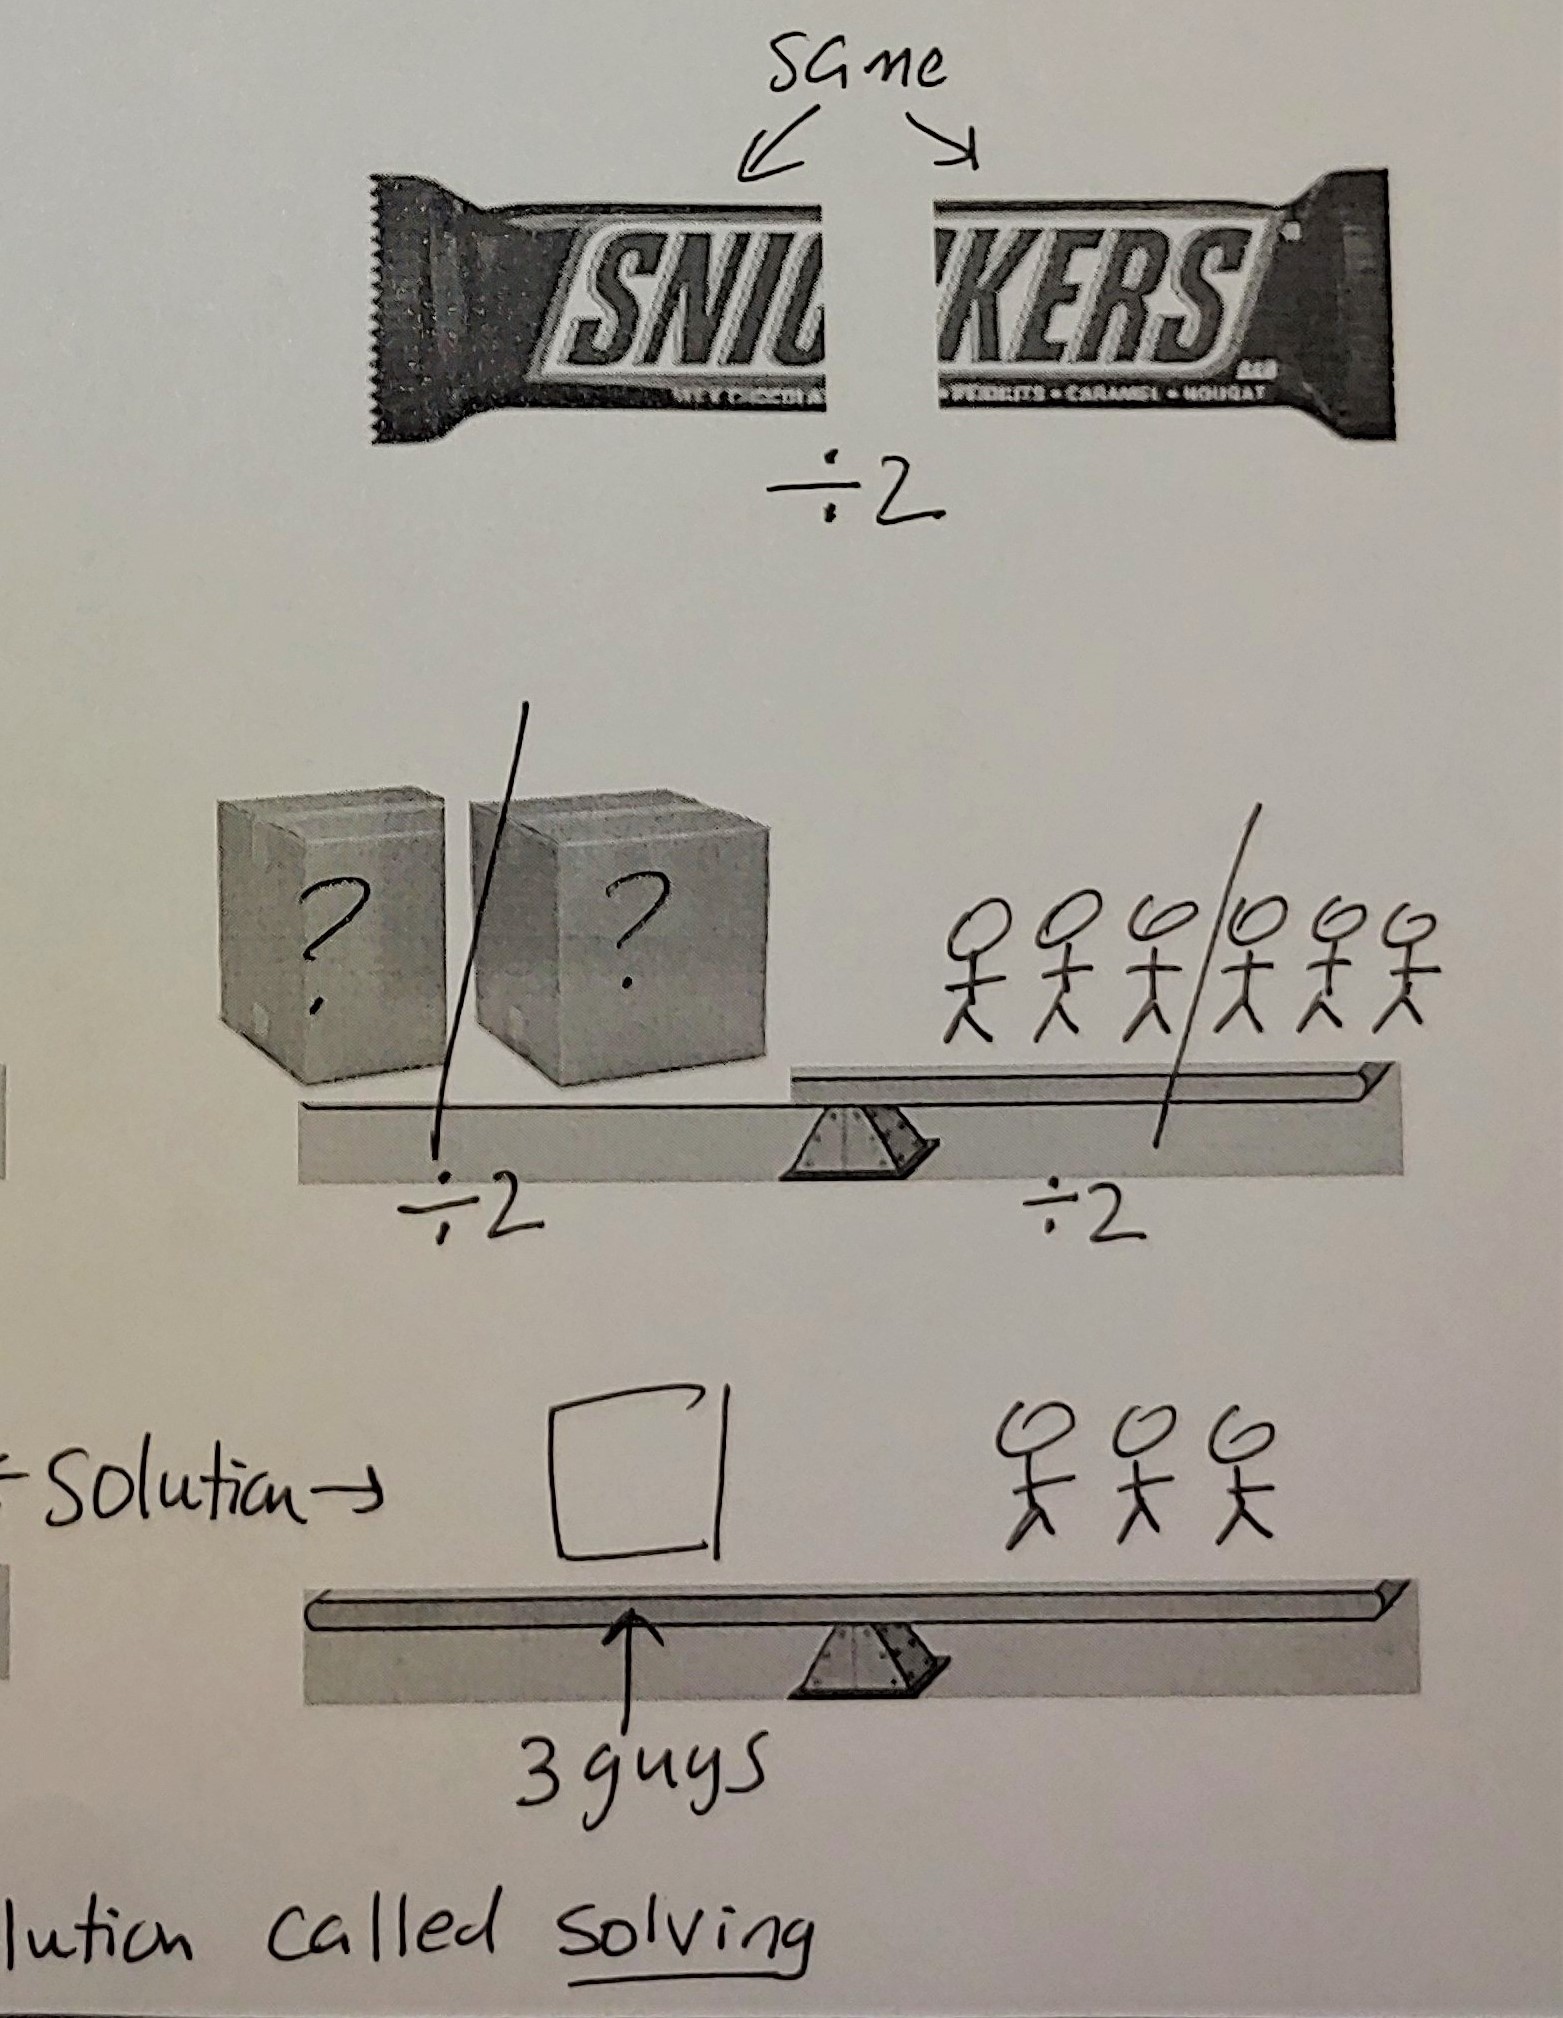
I then explain that the same number of guys must be removed from both sides to keep the seesaw balanced.

I then apply the subtraction shown above to show how the box (containing an unknown number of guys) is isolated. I explain that the isolated box represents a solution and that getting the box by itself is called solving.

I use a scaffolded handout to flesh out the “mathy” steps. This would be followed by a regular worksheet.

I extend the solving method using division when there are multiple boxes. I introduce the division by explaining how dividing a Snickers bar results in 2 equal parts. When the boxes are divided I explain both boxes have the same number of guys.
The students are then provided a scaffolded handout followed by a regular worksheet.
2 responses to “Introduction to Solving Equations”
[…] typically get a presenter standing at the board talking through the examples. (I’ve posted on my approach to solving […]
[…] There are several layers to solving equations that can be unpacked using a task analysis approach. This includes written and mental steps (such as what we teachers mean when we tell a student to do the same thing to “both sides of the equation”). Here is how I develop the concept of equations and solving. […]